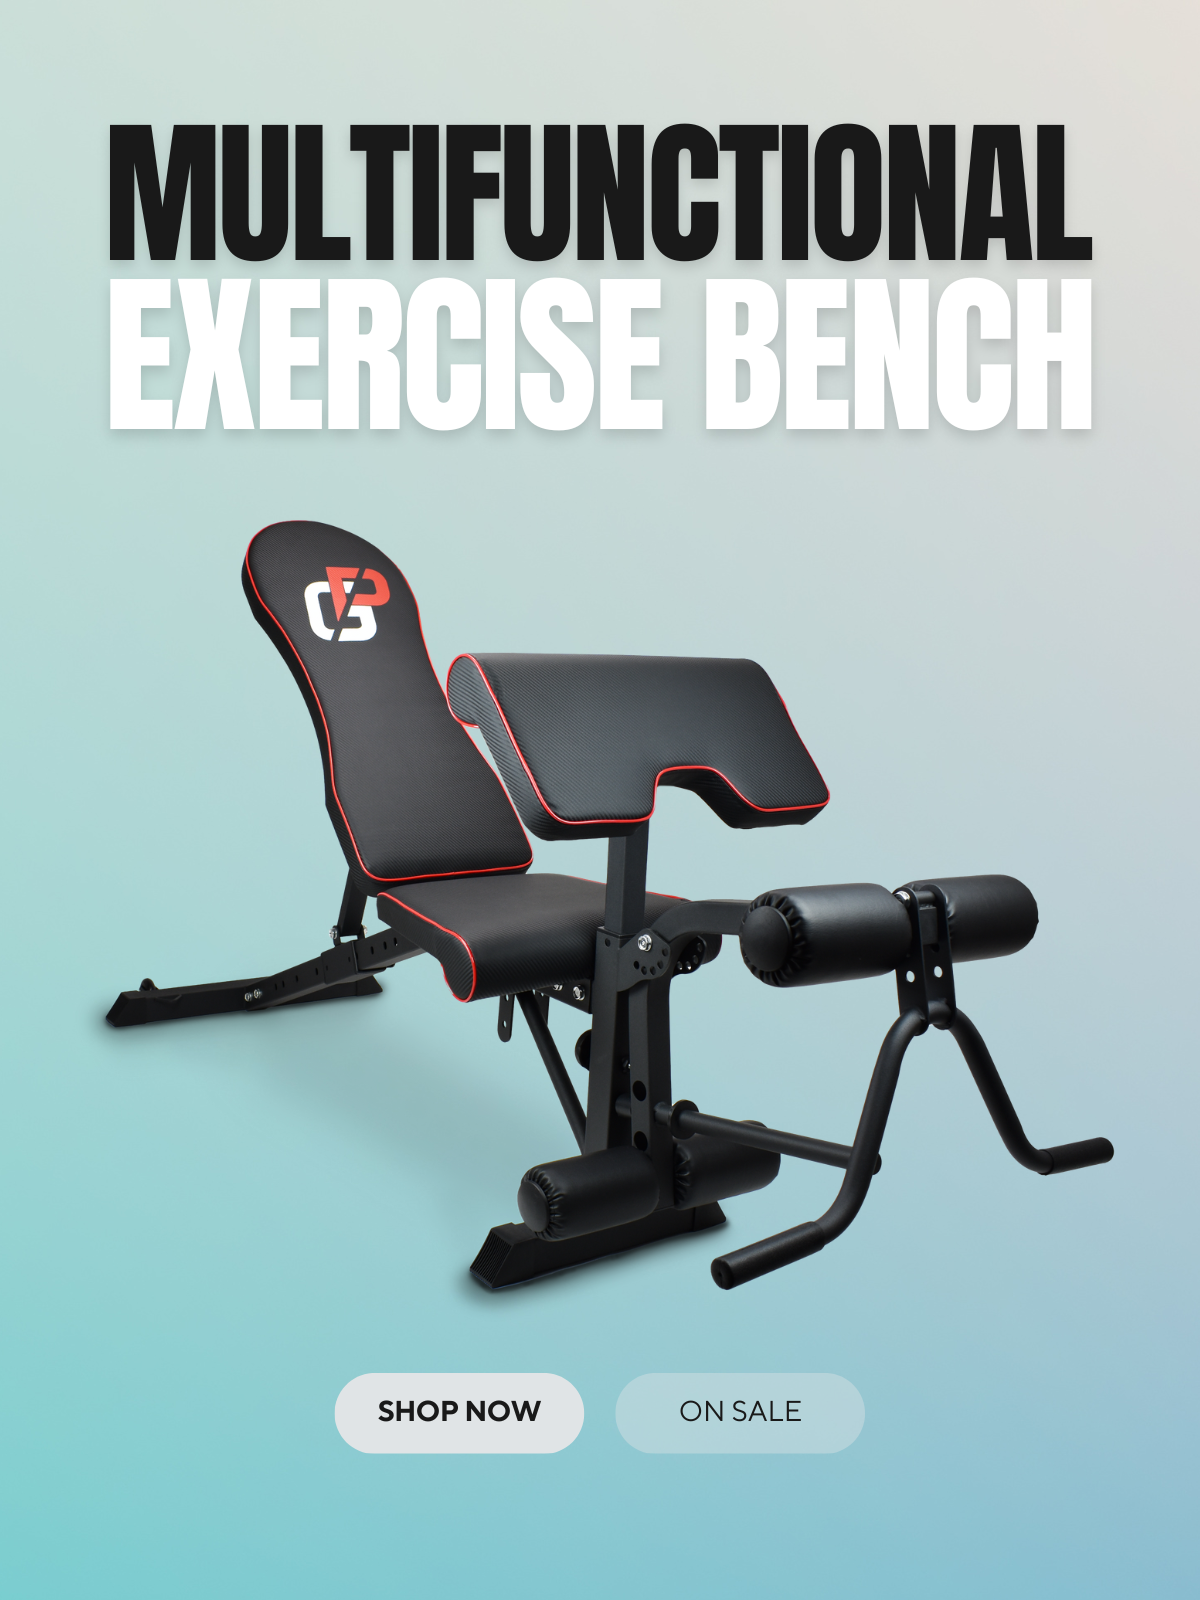
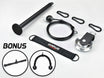
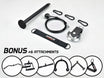

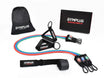
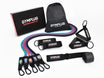
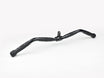


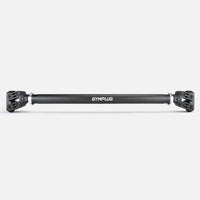
Pull Up Bar
Installation & Product Guide

Pre-Installation Warning
The Pull Up Bar exerts extreme pressure outwards to remain secure in position. Therefore a durable surface and strong frame are required to prevent any damage. This product is not suitable for any weak/fragile surfaces (eg. drywall, glass, wooden door frames) or any slippery surface (eg. tiles, polished/wet areas). The area is required to fit the entire non-slip grip pad (4.5x8cm). Please note: The bar is very durable and the wall will break before there is any damage to the bar. Apply the Protection Pads to provide a layer of protection to the installation surface (eg. painted walls).
1
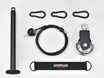
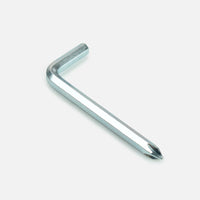
Open and loosen the Safety Locks by twisting the Thumb Screws anti-clockwise. Loosen the Pressure Screw with the Screwdriver.
 Click on the underlined parts to see a picture.
2
With the Safety Locks loosened, you can now freely rotate both ends to extend the bar. Extend the bar until it is 1-2cm short of the installation distance.
It is important to have both ends of the extended bar equal in length. Do not extend past the 92CM limit.
3
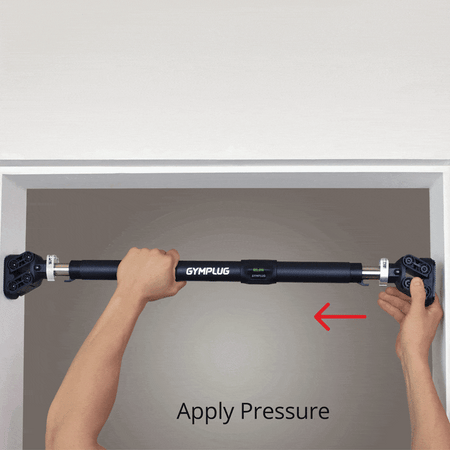
Put one end of the bar onto the wall (or Protection Pads) while holding the other end and applying pressure towards the wall. This is to keep both ends stationary while extending the bar. Rotate the middle of the bar to extend both ends simultaneously.
If the end touching the wall keeps moving while extending, apply additional pressure from the other side or have somebody assist with this step.
4
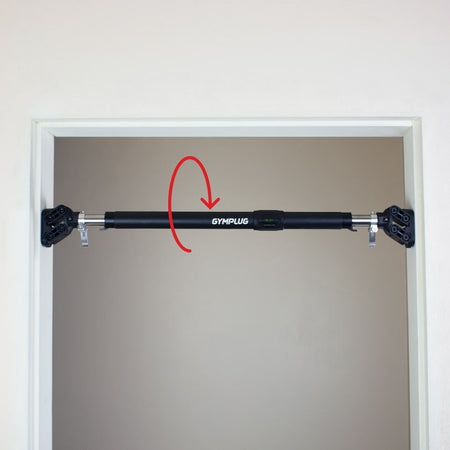
Once the bar reaches the wall on both sides, use the Spirit Level to confirm the bar is straight. Rotate the middle and extend the bar as much as possible to ensure a secure installation. Please note: the installation area needs to be solid and durable to handle the extreme outwards pressure of the bar.
It is important to have both ends completely vertical and with the correct side up in order for the Gravity Tightening mechanism to function accurately. Click here if the Spirit Level isn't functioning as expected.
5
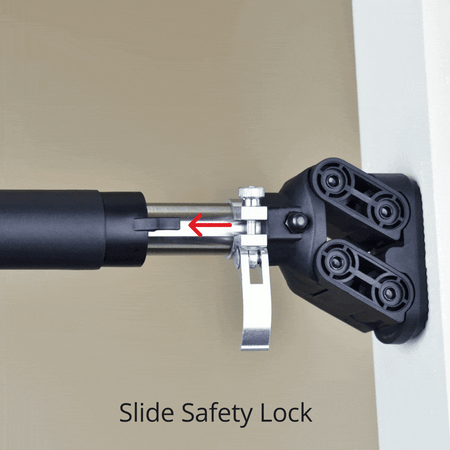
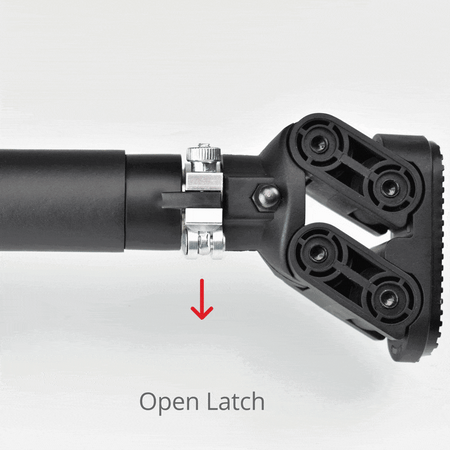
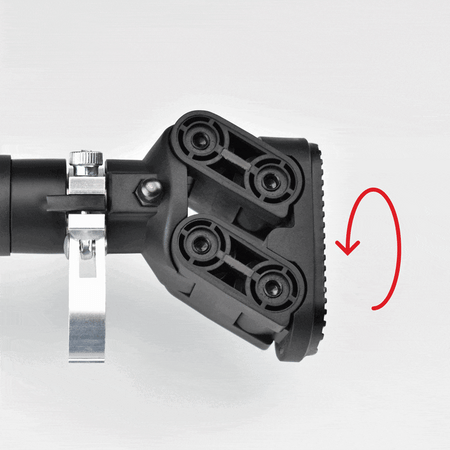
Slide the Safety Lock into position and tighten the Thumb Screw as much as possible. Close the Safety Lock. Click here before tightening the Pressure Screw with the Screwdriver.
You will know the Safety Lock is tight enough if there is pressure when closing it. The purpose of the Safety Lock is to prevent the bar from rotating and loosening while exercising.
Before beginning any exercise it is important to test the safety of the bar. With your feet ~5cm centimeters off the floor, pull down on the bar to check for any movement. If the bar moves then it needs to be further extended (Step 4). If the bar rotates while exercising that means the Safety Lock needs to be further tightened (Step 5).
To uninstall the bar, simply follow the same instructions in reverse. Remember to follow all of the Product Usage Guidelines below.
Product Usage Guidelines
Don't perform any dangerous movements on the bar (eg swinging or upside-down exercises).
Test the bar before each use as it will loosen over time.
Grip the bar in the direction that will extend the bar if rotated while exercising.
Don't install the bar too high to prevent any falling injuries.
To be installed and used only by healthy adults.
The load on the bar should never exceed 220lbs/100kg.
Ensure the bar is level and not extended beyond the 92cm limit.
Consult with your doctor before starting any exercise.
×
Do not use any power tools or apply any additional force when tightening the Pressure Screw.
The purpose of the Pressure Screw is to tighten the Safety Lock even further. This is done by screwing the Pressure Screw against the steel rod to hold it in place. It is important to be especially careful when tightening the Pressure Screw as it can be easily overtightened and damage the thread rendering it useless.
The purpose of the Pressure Screw is to tighten the Safety Lock even further. This is done by screwing the Pressure Screw against the steel rod to hold it in place. It is important to be especially careful when tightening the Pressure Screw as it can be easily overtightened and damage the thread rendering it useless.
×
If the Spirit Level isn't functioning as expected it could be due to the following reasons. Please allow a minimum of 10 seconds without any movement for the Spirit Level bubble to move to its final position. If you believe the bar is straight but the Spirit Level is still indicating otherwise, it could be due to the installation location being unlevel (eg. the house foundation slightly unlevel). In this case, install the bar without the Spirit Level assistance.
If you require any further assistance with your Pull Up Bar please contact us here 🙂
Was this product guide helpful?
